
OTHER CHAPTERS


For a very long time, we chalked up the different throwing mechanics that the best catchers in the world were using simply as approaches they were able to get away with because they were world-class athletes or "freaks of nature."
Now they might just be such freaks, but the reason their throw looks different than what is universally taught around the game is not due to that fact. The reason these throws look different than everything that I have ever been taught is simply because the movement patterns these athletes use to throw are right. Just about everything I was taught growing up in the game is very incomplete.
Now let me throw this out there right from the start. If you've bought our DVD, "A Coach's Guide to Training Catchers," this will be very different. What we currently teach is a product of the approach we have always taken with our instruction: prove to us there is a better way, and we will teach it.
I'll continue to search for a more efficient and dynamic approach to every skill, and if I find one, I'll teach it. As hard as it was to really accept that this change was necessary, it has gone a long way in helping our students achieve the goals they have set for themselves, and I couldn't be more excited to share this information with you.
To explain the reasoning for the change, I must first tell you a story:
I can remember the night when my father explained the idea of "Scope and Sequence" to me. It was around 2 am, and I was up grabbing a glass of milk and a handful of Oreos. We got to talking about the struggles I had been experiencing while working with some of my students. I couldn't understand why some of them "got it" and some of the catchers I was working with just flat out looked lost.
That was the night my views on teaching and coaching changed forever. You see, my father was an educator trained in kinesiology and biomechanics, and little to my knowledge, he'd been preparing me for this conversation since I was twelve.
Throughout my life, my father would routinely take the time to break things down, sometimes getting far too in-depth into a subject than I thought necessary. But now it all made sense. We need to see the big picture, but the steps in a process are just as important as the results associated with it.
My father taught me that in order for a positive result to be repeated consistently, the entire process required to achieve it needs to be presented and explained to a student first, and then consistently reinforced.
We've certainly come a long way with the instruction we have provided to catchers around the country over the last 22+ years, but one of the things my father never let me forget was that in order to be a great teacher, you must continue to maintain an open mind and remain an attentive student.
As such, my father always maintained that if there was a better way of doing something, a better approach to any of the skills that we teach, and you could prove to us that it was better and more efficient than what we currently taught, we'd change what we teach.
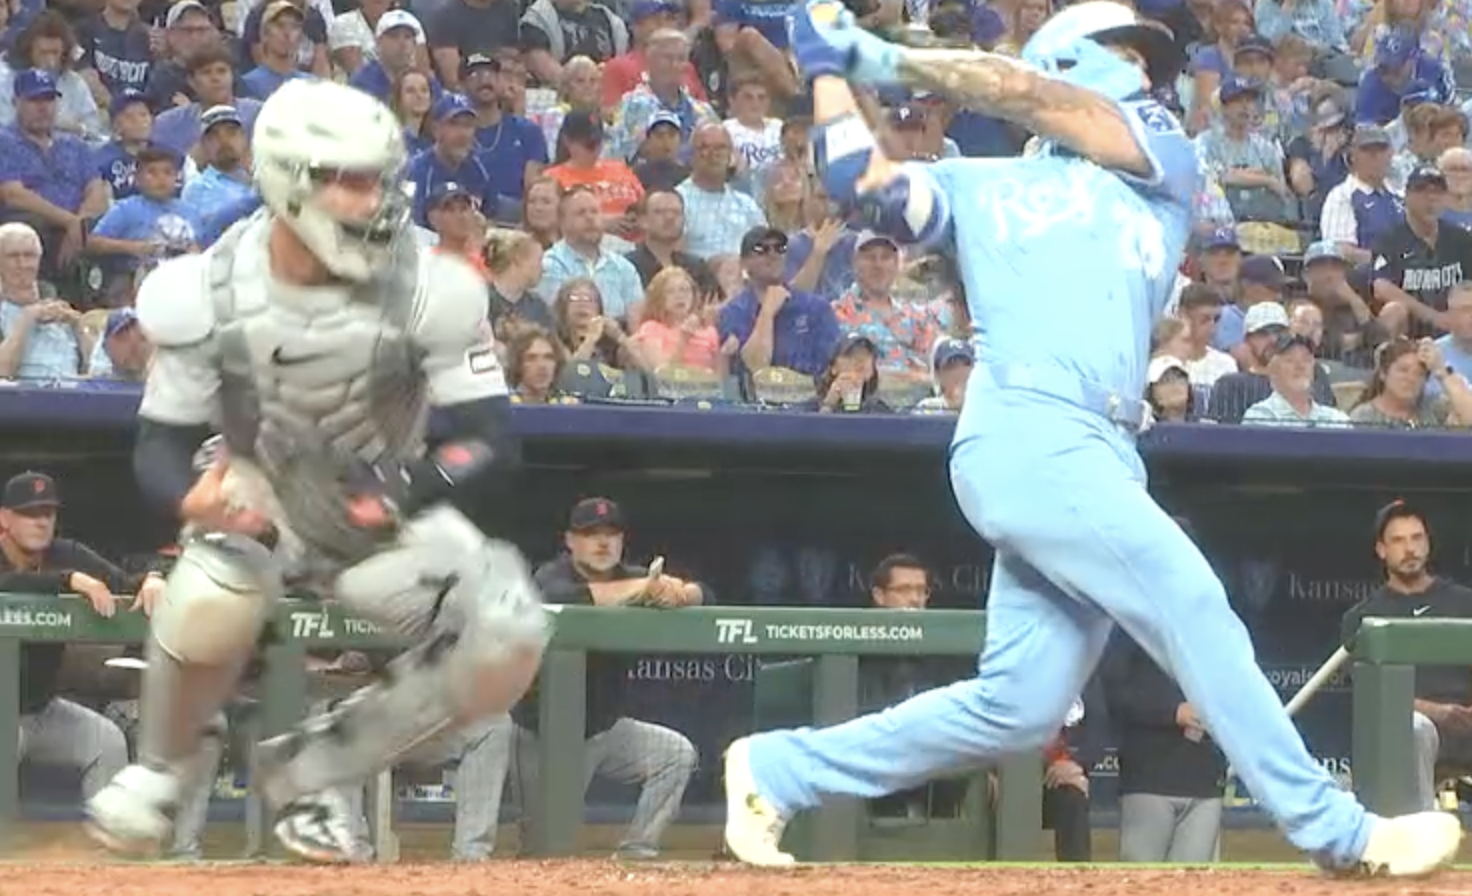
Well, one night it happened. I was shown a video of former Philadelphia Phillies catcher Carlos Ruiz throwing to 2B. I had often referred to him as the closest Major League representation of what we used to teach back then. This is what I saw.
Now, I don't want to say that this is the clip that changed my entire thinking of the throwing motion, but this clip certainly got the ball rolling.
There was something very different about the movement his arm was making, and I didn't quite understand it. What I saw was a throwing motion that never stopped moving, was incredibly fluid and smooth. The idea of a wave was the first thing that popped into my head: a constant build of energy, reaching a peak, and then crashing upon the expulsion of that energy. This was very different than what we had taught in the past or what I had been taught when I was still playing. What I saw were the elbows leading the arms behind the body, providing resistance against the stride of the front leg.
I saw, for the very first time, thoracic extension, which happens as the back hip thrusts forward, and the spine is forced to follow in the same direction, pushing the chest out from the shoulders.
What I saw next literally threw my head into a tailspin. It was the ball dropping behind Carlos' body, parallel (if not just for a split second) with his waistline as his back hip began to drive forward and his front pelvis continued to open.
Nothing stopped, and it literally looked like a whip at the point of release. More importantly, it looked like the arm had little to do with the acceleration of the ball moving forward. I was very confused. It was at that point that my perception of an efficient throwing pattern changed for good.
I started acquiring video at a rampant rate and, not so shockingly, realized that nearly every high-level player uses this throwing motion. I was sure it wasn't a coincidence, and it also couldn't possibly be because they were so much more athletic than the majority of players I had worked with in the past. So I started on a journey to find the truth.
The result of that journey and the ensuing years of research are outlined in the rest of this section.
THROWS TO 2B:
The first step in creating a successful throw is to understand that the throw is not a position. It's a process. And one of the best ways I can explain this process is to help you understand the difference between it and what is most commonly taught to catchers around the world.
Unfortunately, your experience is probably not that much different from mine. Pull the ball to your ear, keep it short, throw like a catcher. These are phrases I had grown accustomed to hearing on a baseball or softball field. Now I cringe when I hear them.
There is this idea out there, and it has been since the beginning of the game, that an athlete must adjust their throwing motion to the position in which they play. When you think about it, I mean really think about it, this is absurd. The goal is to use an overhand throwing motion to propel a round ball towards our target, right? Why should we change our approach simply because we are standing on a different part of the field? The biggest difference between any two positions is the amount of time you have to complete the throw. The core athletic movement patterns that you use to accomplish this should not change.
This brings me back to the most commonly used instructional phrase to describe a "catcher's throw". "Pull the ball to your ear and throw." The idea is that by doing this, it keeps the throw short. And we all know how time-sensitive a catcher's throw is, so this should help us get rid of the ball more efficiently, right? WRONG.
By simply pulling the ball to your ear, you neglect the strongest, most supportive muscles in your body, in favor of utilizing the muscles that were not designed to power the throw. Ultimately, we want to take advantage of what the rest of our body can do to support our throw. Our back muscles (lats), our quads, our hamstrings, our glutes, our abductors, and our hip flexors, all of the muscles that are in some way attached to the hip, need to be used to create the power in our throw. Otherwise, we risk injury and general inefficiency.
If we can create resistance between our upper body and our lower body while moving forward, our arm essentially becomes the delivery mechanism for the ball, rather than the power source. It's the idea of thoracic extension and scapular retraction.
The more thoracic extension you have, the more scapular retraction you'll experience, and the more your arm will "lay back" into external rotation at the correct time. This allows the arm motion to be generated by muscles other than the rotator cuff. Basically, if we can repeat this motion consistently, we can take more stress off of the rotator cuff and other vulnerable parts of our arm during the throw.
How does that happen, you might ask? Well, let's first talk about the direction of the weight transfer in this throw.
We must realize that the transfer of weight should always happen in the direction of our target. You will notice in the clip on the right that the student is set up for a drill in which his front shoulder starts out pointed at his target, his back shoulder facing behind him. We can call his left shoulder "front" and his right shoulder "back." Here's where it gets a bit tricky.
An efficient throw is not a side-to-side transfer of weight. It is a "back" to "front" forward motion. However, in a high-level throw, the side of the body that is defined as "back" and "front" will change throughout the throwing process.

The orientation of the weight transfer changes as the body turns forward. The student's chest becomes "front," and their backside is "back." The body will, in fact, be moving along three different planes.
This has much to do with the drive off the back leg and rotation of the hips. When the pelvis turns forward through the transverse plane, it pulls the Lat muscle with it. The Lat, also being connected to the humerus bone, pulls the arm through the frontal and sagittal planes into a "layback" position. As the pelvis continues to rotate, the upper body continues to drive forward, and the arm, accelerating behind the body, whips forward.
We cannot achieve this with a "spinning" throwing motion. A spin places all of the responsibility of the throw on the arm, rather than the surrounding musculature. This can be a major cause of shoulder pain. A spinning motion is often what results when a catcher attempts to "pull the ball to their ear and throw."
If you take a look at the Carlos Ruiz clip again, notice how as the orientation of his body changes and he turns the arm forward, the ball and the elbow seemingly trade places, creating a turnover effect. Meanwhile, the ball never stops building momentum. All of the energy, which was generated behind him, is being transferred directly into the ball, towards his target, with little to no stress on the more vulnerable parts of the arm.
One of the things I used to think about all of the time were those throws I made where I didn't know how they got to where I threw them. I can remember letting the ball go but feeling nothing as I did it. The ball left my hand with more velocity than I thought I had the ability to generate, but with significantly less effort compared to most of my throws. I wanted to find a way to repeat that feeling but had no idea how or what I did. Now I do.
WHAT IS POP TIME AND WHAT'S ITS VALUE?
A catcher's "pop time" refers to the time it takes a catcher to get the ball from their glove to the glove of the infielder covering second base on a throw.
The pop time to second base is talked about so frequently that it has become a tool by which to measure the catcher's overall ability behind the plate. This measurement very often creates a false metric that ultimately means very little in the overall value of that particular catcher to their team.
In fact, the more important intangibles of a catcher are almost always overlooked. For one, a good receiving catcher will net you more strikes per inning than a catcher who does not know how to receive the ball properly. That should be obvious and a given.
Two, a catcher who possesses good blocking mechanics gives the pitching staff confidence to throw any pitch at any time in any location without the worry that a runner will advance on a ball they throw in the dirt.
And three, a prepared catcher with a defensive mindset will be able to aid their teammates in the crucial split-second decisions that need to be made during the game. However, coaches are always judging catchers exclusively on their throw-down times to second base.
It is not a meaningless number by any stretch, but it can be extremely overvalued if other factors are not taken into account.
Most pop times are recorded in training environments without a batter standing in the box taking their hacks, or without the pressure of an in-game situation. The catcher can often cheat the stopwatches during the training environment throw by getting their body to a location to catch the ball they wouldn't be able to if it were an actual game. Some catchers even go as far as to take a step or two forward across the plate before the ball ever gets to their glove. Good luck doing this in a game! Hope the feeling of a bat hitting your body is one you enjoy because that's the only way you'll be able to recreate that "great" throw in a game.
The only pop time I give any credence to is the one recorded in a game situation and there is video proof, that is if I myself wasn't there to personally time it with a stopwatch. That's not to say we can't use practice time pop times as a gauge of the progress a catcher has made, but the context is very important.
The point of this section is to focus on how to improve a catcher's mechanics and efficiency during a throw to 2B, and while I do not want to ignore the quantifiable measurement of pop time, I do want to make it incredibly clear that this "statistic" should NOT define a catcher or their ability to play the position well. It is just one piece of the puzzle. I find it much more valuable for our catchers to be rock solid behind the plate in their receiving and blocking skills than their ability to throw out a runner at second.
Coaches need to be more concerned about the mechanics being efficient rather than the time on the stopwatch. Keep in mind that a catcher's throw is only one piece of the puzzle during an attempted stolen base. The pitcher's time to home plate (from the first move in baseball and from the release of the pitch in softball), the location of that pitch, and our infielders' ability to catch and put down a tag are all just as important as our throw because they all have the ability to sabotage the outcome equally.
Now, what is a good pop time, you might ask?
To give you an idea, let me first give you a good frame of reference. I was an associate scout with the Los Angeles Angels for a little over six seasons, and I can count on one hand the number of catchers I saw with in-game throws to 2B under 2.00 at both the high school and college levels.
The best catchers in Major League Baseball are consistently throwing somewhere around 1.80-1.90 during games. Similarly, the best in the game of softball (NCAA Division 1) are consistently throwing 1.75-1.85 during games. The average throw in both games is at or right under 2.00 seconds. This means that some of the catchers playing at the absolute highest level of baseball and softball are still throwing over two seconds to 2B in games.
The average in-game pop time at the high school varsity level of baseball and the U18 competitive softball circuit is around 2.35 seconds. This includes everyone playing at that level. The good catchers at those levels will throw somewhere in the 2.10-2.25 range. The great ones will occasionally throw under that.
Don't forget that even "average" throws will result in a lot of outs, and these catchers should be able to throw out runners at some level of college baseball and softball.
Now that we know what the goal is, let's take a look at how to achieve it.
STANCE AND BODY POSITION BEFORE THE THROW:
In order to execute the mechanics of a high-level efficient throw, we first need to address the one thing that can sabotage a catcher before the pitch has even left the pitcher's hand: STANCE.
I field phone calls and emails from catchers, coaches, and parents of catchers all year long. The majority of the calls I receive are regarding a catcher's throw to 2B and how to improve upon their existing throw or fix a specific issue they may be experiencing.
The issue could be that the ball is sailing into the outfield, tailing into the runner, or spiking the ball into the ground, but my first question will always be the same: "What does the catcher's stance look like before the ball leaves the pitcher's hand?"
Very often, I'll get this response from the person at the other end of the phone: "Coach Jay, you must have misunderstood me, the issue isn't with the stance, we're just having trouble keeping the ball from flying over the infielder's head and into centerfield. How do we fix that?" My frustration with this reply has no boundaries.
Remember at the beginning of this chapter I made note of "Scope and Sequence" and how that frames the instruction and analysis our program provides? The ball flying over the infielder's head is NOT the cause of the problem. The same can be said for the release point in the throw. Those are symptoms of the real issue that is causing the body to produce a throw perfectly over the infielder's head. Very often, we can trace the flaw in a catcher's throw all the way back to the stance they used to receive the pitch.
To allow your body to work through this very complicated athletic process, the starting position you use must be athletic, balanced, and powerful. Hence the "Runner's On Base Stance" we outlined at the beginning of this e-book.
The goal is to "unlock our hips" and allow for a quick explosive move upward while getting our body turned before heading towards our target. Staying in a deep crouch with a runner on base can force us to waste time getting our hips back to neutral (in line with knees) before we can start a positive move up out of our crouch.
Staying low may also force our lower body to kick out to the glove-side while we attempt to bring our throwing-side foot underneath our center of gravity, causing the weight of our body to start heading in the wrong direction.
OVERLAPPING MOVEMENTS:
How many times have you heard this? "Stay low, throw low." Or better yet, "if you stay lower in your throw, you'll be able to save time in your release by not spending the 'extra' time to stand up." This misinformation is so widely accepted in the game that it has become most coaches' routine approach to teaching catchers the skill of throwing to 2B.
Let me ask you this: How many catchers stand on the foul line before the game and throw from a prone position while warming up? The answer? Not one!
Our body does not work through a throwing motion most efficiently while prone. At least, it won't within a small window of time when trying to get the body turned in the direction of 2B. Now, I will concede that if catchers had an actual missile launcher attached to their arm and all they needed to do was simply crouch down, line it up with 2B, and pull the trigger, this approach would indeed make sense. But if I am not mistaken, science hasn't yet developed a catcher's bionic rocket ball-launcher artificial arm.
There are a lot of moving parts here, folks. We need these moving parts to move fluidly, and that won't happen while tense in a prone position. The other argument claims that by standing up, we somehow lose time getting rid of the ball. Again, this line of thinking is short-sighted and just not true in any way.
I'll concede that if a catcher simply stood straight up immediately after catching the ball, without making any other movement whatsoever, this argument would be plausible. This isn't what ACTUALLY happens in a high-level throw, though.
Are these catchers "staying low" in their throw? They are not. Are they rigidly upright? They aren't doing that either. Are they athletically upright? Yes, they are.
Staying low also does NOT save time! Catchers are going to stand up in a throw no matter what. They can either stand up in the beginning of the throw like we prefer since it allows them to generate a throw "downhill" through second base, or they can stand up at the end of the throw, which will often lead to a high throw away from the play.
This throw from Austin Barnes in 2018 may have been the most important throw of his career to this point. The pitch was low, for sure, but our arms can work quicker than the rest of our body, and a simple turn up of the wrist after he caught the ball was all it would have taken to have gotten it to the middle of the chest to make the exchange. Instead, he stayed low at the beginning of the throw and stood up as he was throwing, causing the ball to get to second base high. The runner, Ryan Braun, was safe. The fact remains, however, that the throw actually beat Braun to the bag. But, because it was about four feet too high, the infielder couldn't get the tag down in time.
Our goal should be to get our body moving early, before the ball ever hits our glove, and do so while moving upward as we get our upper body turning towards our target.
I've heard coaches calling this "cheating," but I would wholeheartedly disagree. I will trade a strike for an out all day long.
PROCESS:
There are multiple things that need to happen in order to get the body positioned to throw a ball towards a particular base:
1. Start standing up.
2. Pinch the throwing-hand-side knee slightly to clear a path for the front hip to point towards the target.
3. Start turning the upper body/shoulders towards the target.
4. Catch the ball.
5. Bring the glove on top of the throwing hand (palm up transfer) in the middle of the body to transfer control of the ball to the throwing hand.
6. Finish turning the upper body towards the target.
7. Bring the throwing-side foot directly underneath our center of gravity, pointing the instep of that foot to 2B.
8. Get our front hip closed towards our target.
9. Stride forward while beginning to throw.
Of the nine movements listed above, the first seven are going to happen while the catcher stands up. The keyword here is OVERLAP.
These overlapping movements allow the body to get athletically upright, turned towards our target, gain control of the ball in our throwing hand, and have the back foot planted underneath our center of gravity. ALL AT THE SAME TIME. This domino effect of movements is what allows catchers to get rid of the ball faster, but only if the catcher has been taught how to execute them consistently.
WHAT MOVES FIRST?
There are a lot of opinions on what should happen first, but I believe there is truly only one way to initiate the throw efficiently. In keeping with the idea of overlapping movements, we must first concede that what moves first is not a singular part of the body. There are multiple things occurring, not just the moment the ball hits the mitt, but in the moments prior as well.
I want you to pay attention to what is happening as the ball makes its way to the catcher's gloves in the videos in this section. You'll notice that their left knee begins to tuck in towards their right.
This will allow them to ensure that their hips don't shift to the left while getting their upper and lower body turned towards 2B as they stand up.
Without this move, it is far more likely a catcher will lose their hips before the body ever starts moving towards their target during the throw.
This pinch in of the knee transitions directly into the move upwards out of their crouch as they catch the ball.
Before the ball even gets to their gloves, you can see the glove-side knee pinching in towards the other.
Think of this knee pinch as the top part of the leg (the femur) simply rotating inside the hip socket as the left knee is pinched slightly towards the right (for righties; the reverse for a left-handed catcher). It is also important to realize that this movement does NOT happen until the ball is on its way to us. Pre-setting the pinched knee before the pitcher lets go of the ball might put us in a fairly restricted position which will prevent us from adjusting to a pitch not thrown where we called for it. At least in a way that allows us to keep strikes looking like strikes. The catcher should wait until they know exactly where the ball is going to be, shift their body to make sure they are receiving it inside their shoulders, and THEN pinch the knee in.
EXCHANGE AND FOOTWORK DURING THROWS TO 2B:
What defines the exchange?
Now it is very important to note that they aren't pivoting on their left foot and sinking into their left side. Doing this would force the hips to the left, and that is the direction their body weight and momentum would follow. We want to control all of our momentum, not wasting any energy moving in a direction other than towards our target (once our back foot gets underneath our middle).
Ask yourself this question: "Where is the ball traveling its fastest on its journey to 2B?" The answer is simple: "When the ball is out of your hand and in the air in front of you." But, you can't get the ball into the air until the ball is in your hand, right?
The exchange of the ball from glove to hand is obviously one of the most important steps in the throwing process, and it can very often be the difference between "safe" and "out." Let's focus on this one piece of the throw here for a moment.
The physical location of the exchange in relation to the body is also one of the greatest influences on the success or failure of a catcher's throw. We need to make sure that the exchange is happening not only at the right time but also at the optimal location. In order to find both the proper timing and location for the exchange, we need to first understand what the word "exchange" means.
*For the sake of this section, please ignore the OKD stance the MLB catchers are using in some of the videos. As we have covered previously, this position is more than acceptable at the highest levels of the game because the quality of pitching is significantly higher.
The "exchange" is the point at which we have directional control of the ball in our throwing hand. This should happen while the hand is wrapped around the ball, still inside the glove, and should be completed during the process of getting our body to an athletically upright level.
When should the exchange occur? When is my body prepared to make the exchange?
I'll reiterate the point that the exchange is NOT when the ball leaves the glove. It is when the throwing hand has control of the ball inside the glove.
The timing of the exchange is imperative to an efficient throw towards our target. If the throwing hand reaches the ball too late, we will begin our load too late and possibly in the wrong direction. This will almost assuredly have a negative effect on our throw. If the throwing hand separates from the glove and our body is not in a position to immediately begin loading the arms behind us as we start striding forward, we risk inefficiency and quite often inaccuracy as a result.
So, when should we gain control of the ball in our throwing hand? The exchange should take place as we are standing up out of our crouch. We want to make sure that the moment our body is turned towards our target, the separation of the hands signals the beginning of the throwing motion.
WHERE SHOULD THE EXCHANGE TAKE PLACE?":
The exchange should take place in the middle of our chest. Ideally, neither hand should move past the middle of our body while transferring the ball from glove to throwing hand. The goal is to make the exchange by reaching the palm of the throwing hand under the glove, allowing the ball to drop into all five fingers, securing the transfer. The hands should be in front of our chest. Note that "in front" describes the hand's relationship to the middle of our body, not the body's relationship to the direction of our throw.
Now, the “palm-up” approach is a deviation from what we used to teach, so to give you a better understanding as to why we made this change, it’s important to understand the things that can go wrong during a botched transfer.
For one, when attacking the ball inside the glove with a palm-down approach, the ball is likely to roll out of the pocket of the glove after we open it. This makes grabbing the ball with three fingers that much more difficult.
By dropping the ball into the throwing hand with the palm up, it makes it very difficult to miss the transfer.
The other major reason this approach helps increase the efficiency of the entire throw is that it is a far more direct path from the glove to get into the throwing pattern. A catcher merely needs to think “Lift the ball up out of my glove”, while the lower body is turning forward and more often than not the arm will fall into a high-level throwing pattern.
As we stand up out of our crouch, the trunk of our upper body turns against our hips to ensure that the angle and direction of the arm movement is directly up our of our glove during the start of the throwing motion.
What is the next step, you might ask? Footwork.
After we've gained control of the ball in our throwing hand, the ball firmly in our throwing hand (palm up) inside of our glove, our body at an upright and athletic level, and the shoulders completely turned towards our target, the throwing-side foot/instep must begin to make its way underneath our center of gravity.
Our instep (pictured below) should be positioned directly underneath where the bulk of our body weight is resting, our center of gravity.

A number of things need to happen as we pick up and set down the back foot underneath our center of gravity. We should complete the upper-body turn, and right before our throwing-side foot stops at our center of gravity, our hips will finish closing towards our target. Once the back foot hits the ground, and hopefully with the entire front side of our body lined up with our target, we begin our stride forward. This will allow us to drive into the throw using our lower body the instant that the back foot hits the ground underneath us. This entire sequence reinforces the previously mentioned concept of overlapping athletic movements.
Something to pay close attention to here is the direction of our hip movement as we get our back foot underneath our center of gravity. If we have not stood up enough (or we've started in a stance where our hips are lower than our knees), the amount of force and friction acting on the moving foot will be too great to allow it to move as freely and accurately as we need it to, and it's common to see a catcher's hips kicking out to the side.
Once our hips kick out to the side, we are instantly in a battle to maintain control of our body momentum during our throw, and it is a battle we won't often win. Sometimes our back foot will move past our center of gravity, and we'll end up stepping across our body during the throw. This not only will take us longer to get rid of the ball but will also lead to a throw that primarily uses our upper body to power it.
If the front foot hits the ground as we are closing the front side of our body instead of opening it, it will be hard to use our lower half to generate power in the throw. It'll essentially become a spin open with our upper body, and the responsibility of creating power in the throw will fall on the arm.
The problem here is that it will cause too much pressure and unwanted force to be put on the arm. This can also cause our throwing arm to work away from our body as we spin our upper body to throw, leading to a throw that tails to our throwing arm side or misses high.
Once we're athletically upright and turned towards our target with control of the ball in our throwing hand, what's next?
Simple...THROW THE BALL!
Once a catcher begins their stride forward, they should be in the process of throwing. Their throwing motion is their load, and their loading motion is their throw. These movements are one and the same. As the catcher drives off the planted back foot, their back hip begins to rotate forward. As their back hip begins to rotate forward, the catcher's upper body remains turned towards 2B. This creates resistance between the upper and lower body as we move forward. This resistance helps increase the force of the throw while decreasing the stress on the arm as it works through the high-level throwing pattern.
Now, again, we should initiate the throw with our hands below our chin, in the middle of the chest, with the hands above our elbows and the elbows below our shoulders. If our hands are pushed down below the elbows as they separate from each other, it will not only elongate the throwing motion and force us out of an efficient throwing sequence, but it will also force our elbows up above the shoulder as we throw. Should this happen, we will create far too much tension in the shoulder joint. We do not want excess tension in this joint during a throw, as it needs to remain relatively relaxed to allow the arm to move through the pattern unrestricted. The tighter our shoulder joint gets during the throwing motion, the more restricted the arm is in its ability to externally rotate and lay back into the pattern we need it to when we need it to, in order to avoid creating a throwing motion that puts too much pressure on parts of our arm that are not meant to handle it.
The phrase we use to teach catchers to limit downward or upward movement with their arms after they've established control of the ball in their throwing hand is to "throw from their middle". The moment the hands separate, we're throwing. And, we need to do that while limiting the space in which our arms move through the throwing motion. This pattern should be very repeatable, but that only comes with practice.
BALL FLIGHT TO SECOND BASE:
For the catchers whose bodies are not yet capable of producing a throw that gets to second base, coaches need to do a better job of making sure they know it's okay to one or two-hop the ball there. Otherwise, those catchers are going to completely abandon the approach they've been taught above, just so they can muscle a ball to second base in the air, farther than their body is capable of. Remember, the ball is never traveling any faster on its way to second base than when it is out of the catcher's hand and in the air. Anything they do in an effort to gain more distance in their throw that costs themselves the ability to get rid of the ball quickly will have a negative impact on the throw long-term. I'd rather my catchers throw the ball on a line to second base rather than launch a ball that almost touches the sun in an effort to get it there in the air.
We're looking for a "downhill", "line drive" type of throw through second base. No matter what level a catcher is playing at, if they aren't throwing the ball down to second, they are going to cost themselves outs. Not only will the misses likely be high or take longer to get there, but it will almost always lead to a throwing motion that uses far more of the arm to power the throw than it should.
A simple verbal cue we've used in the past is to tell catchers to "lead their hips towards second base with their front shoulder". This can help catchers start the move towards second base with their shoulders fairly level to the ground, and that can help them maintain an efficient throwing motion and stay on top of their throws.
BODY MOVEMENT ON PITCHES THROWN OUTSIDE OUR SHOULDERS:
We've already covered just how important it is to control the direction your hips move during a throw, and how catchers receive a pitch during a steal attempt will have a direct impact on how much of a chance they give themselves to get the out.
Our goal should be to get our back foot underneath where our middle is at the point the ball makes contact with our glove. We should be shifting our weight to the ball to make sure that our body weight is behind our glove and can support the impact of the pitch. So, if our center of gravity changes during the flight of the ball, we need to make changes to the way the back foot moves to get underneath our body.
One of the most challenging pitches to throw off of is a pitch to our throwing side. A lot of catchers turn their body and reach for this pitch. That rotation almost always forces the hips to shift off to our side and lead to our momentum heading the wrong direction.
In this clip, you can see Willson Contreras handling it perfectly. A pitch to his throwing side, he shifts his body weight in that direction while turning his body, picking up his right foot, and putting it down directly underneath his center of gravity. Once that foot comes down, he simply goes forward into the throw. No wasted energy or time. He has complete control of the direction his body is traveling at every step of the throw.
Likewise, a pitch to our glove side and outside of our shoulders presents its complications. But, if we shift our body so that we are able to receive the pitch inside our shoulders, we have a much better chance of controlling our hips.
In the clip above, you can see Kyle Higashioka shift his body to his glove side to receive the pitch and, as he stands up and gets turned towards 2B, he brings his foot directly underneath his center of gravity.
Again, no wasted energy or time.
THROWING FROM THE KNEES:
To conclude this section, let's address a burning question in many minds: "But what about throwing from your knees?"
We've seen countless instructional videos promoting the throw from the knees to 2B as not just flashier but more effective than standing up. Moreover, we have witnessed other "well-respected" catching instructors irresponsibly teaching this approach, disregarding scientific research and testing on the biomechanics of athletic throwing patterns. In short, athletes who have not established these patterns should never throw from their knees under any circumstances.
We have advocated for the standing approach as a far more efficient method of throwing to 2B for as long as I can remember. However, let's take a moment to outline all the reasons why relying on this approach, even with an advanced and efficient athletic throwing pattern, is not advisable for consistent results or as the default approach to throws.
REASON #1: It is NOT safe for the majority of athletes.
Using a throw from the knees as the default approach to throwing is dangerous for most catchers. The reason is simple. There is a significant amount of misleading information available regarding throwing technique and mechanics. Unfortunately, some of this misinformation comes from those at the top of the instructional hierarchy, resulting in high-level athletes exhibiting throwing pattern deficiencies. Until athletes have established efficient throwing patterns that do not put their arms at risk, they should NEVER attempt a throw from their knees. Doing so will put even greater stress on their arm since the bulk of the excess stress in the throw will be felt there. In essence, if you cannot throw efficiently while standing up, it is unrealistic to expect that you can do it from your knees. If I encountered a player with exceptional movement patterns from a prone position but flawed standing up, I would still work tirelessly to fix the problem while throwing from a standing position.
REASON #2: It is NOT faster.
When we consider the throw, we often focus on technique and overlook the fact that it is essentially a mathematical problem: getting "Object A" to "Object B" before "Object C" reaches "Object B." Our goal is to achieve this in the most efficient way possible. Throwing from our knees is not the answer. We cannot generate the same velocity from our knees as we can from a standing position. If we can, it indicates a suboptimal throwing motion in general rather than the ability to throw from our knees. In other words, if the velocity of a throw from the knees is the same as the velocity while standing up, there is something fundamentally wrong with the throwing technique.
To gain insights from experts in the field, I reached out to the team at Driveline in Seattle, WA. Led by Kyle Boddy, they have revolutionized the game with a scientific approach and quantifiable metrics for analyzing athletic movement patterns. Their understanding of the human body and throwing skill is unmatched worldwide. Here's what former catcher Maxx Garrett from Driveline had to say about our question:
"I think it is pretty safe to say that you can put more force into the ground from the standing position. From the standing position, I would think that you will be able to create more Ground Reaction Force and greater hip rotation, which will lead to greater velocities. Ball flight takes up a great portion of pop time, so creating this velocity is an important thing to think about."
It is generally assumed that ground reaction force is greater when throwing from a standing position than when throwing from the knees. Although Maxx mentioned they hadn't conducted specific testing on this, it aligns with the principles of physics and biomechanics. Ground reaction force refers to the force exerted by the ground on a body in contact with it. In simple terms, you can create more ground reaction force while standing compared to kneeling, resulting in higher velocities. This is not a matter of opinion; it is a fact.
Some may argue, "But coach, I release the ball significantly faster, so the lower velocity doesn't matter." Here's the issue: we must not overlook the math behind the throw. For every 5 mph decrease in velocity from throwing from the knees, we need to reduce at least 0.10 seconds in our release time. The problem is that most catchers are not actually quicker when releasing from their knees; often, it's exactly the same. The overwhelming majority of catchers cannot release the ball a tenth of a second faster from their knees. Additionally, most catchers will lose 10-20 percent of their throwing velocity when throwing from their knees. If a catcher can only throw 60 mph from a standing position, they will likely throw anywhere from 48-54 mph from their knees—a range that guarantees a slower overall throw from the knees. Despite all these reasons, some coaches continue to hold steadfast to the notion. Even if we were to concede that it might be faster (which it's not—let's not forget that), we still have to confront the fact that...
REASON #3: …It's far less consistently accurate.
In general, the throw from the knees is less accurate. Much of it has to do with the stability of our body while executing the throw, such as shin guards sliding on the ground instead of having the traction provided by cleats when standing. The spikes on our footwear give us better control of our bodies. I cannot count the number of times I have witnessed catchers unleashing a throw from their knees only to see it fail to reach the bag, sail high, or veer off-line to the right or left. We have significantly more control over the direction of our throw while standing. Therefore, it is unwise to take that risk when we are not gaining any real advantage from it and, at the very least, potentially putting ourselves in harm's way.
The only explanation I've heard that I could even partially understand or respect is that it "LOOKS COOLER and is MORE INTIMIDATING." However, the only reason this holds true is because coaches at higher levels keep instructing catchers to do it, especially in softball. But you know what isn't intimidating? A runner safely reaching second base due to a late throw by the catcher or, worse, a runner advancing to 3B or Home because our inaccurate throw evades the infielder. The reputation and control of the running game at the highest levels allow certain catchers to do whatever they want, but that does not apply to everyone. One frequently mentioned name is Benito Santiago. While he was captivating to watch behind the plate, his throwing ability was barely average. His release time was consistently over seven-tenths of a second, and his pop time exceeded 2.00 seconds—both below the MLB average. In terms of success throwing out runners, he was only 4% better than the average MLB catcher throughout his career. To put that in perspective, Ivan "Pudge" Rodriguez was 15% better than his competition throughout his career. Santiago led the league in caught stealing percentage only once in his 20-year MLB career. We are not talking about an elite throwing catcher; we are discussing someone who made it look good when it worked.
Now, it's possible that in certain circumstances, an athlete's subpar athleticism and physical constraints may lead them to develop a high-level throwing motion that is more efficient from their knees. However, in over 22 years of working with over 16,000 students, I have never encountered a catcher for whom that was true. With all this said, it is not to suggest that throwing from the knees should not be a skill in a catcher's repertoire. There are situations where a throw from the knees should be the default approach. Here are some examples:
1. Throwing off a block when the catcher has previously established highly efficient throwing patterns.
2. A pickoff to 1B or 3B when the catcher has previously established highly efficient throwing patterns.
3. A straight steal of 3B, with the pitch bringing the catcher to their knees when the catcher has previously established highly efficient throwing patterns.
4. If, while tracking down a pop-up, the catcher trips, falls, catches the ball, and the runner on 1B inexplicably starts chatting with friends in the stands while standing 5 feet off the bag... and the catcher has previously established highly efficient throwing patterns!
Some argue that catchers who throw out runners from their knees will impress coaches at the next level and deter the opposing team from running. However, throwing from the knees does not accomplish either of those things. What matters is the runner safely reaching second base.
Throwing from the knees may be effective in certain situations (as outlined above), but as a default approach, it is not faster or more effective. It also has the potential to damage an athlete's arm if they have not first established an efficient throwing motion. Therefore, it should not be taught until those athletic movement patterns have been developed.
THROWS TO 3B:
When it comes to making a throw to 3B on an attempted steal, it's essential for catchers to understand the rulebook. Most importantly, a right-handed hitter does not need to move out of the way of a catcher's throw. They are entitled to the batter's box, and as long as they don't impede the throw intentionally or unintentionally, they can stand still in the catcher's way. It's the catcher's responsibility to create a throwing lane to 3B.
Do hitters sometimes step back into the path of the catcher? Absolutely. Do umpires always make the call? Definitely not. Therefore, it's crucial for catchers to avoid attempting a throw if the hitter moves into their throwing lane. Why don't we teach catchers to make the throw regardless? It's simple. Since there is no guarantee of interference being called, making the throw in such a situation has almost no chance of resulting in an out. However, it does have a decent chance of resulting in a run.
The most important thing to consider during this play is that if the throw gets by the third baseman, whether due to the catcher's errant throw or a mistake by the third baseman in catching the ball, it's almost certain that a run will score. If a hitter backs into the throw, DON'T THROW! Not only are we risking an errant throw, but we are also risking injury if we end up hitting our hand on the hitter's helmet or bat. It's simply not worth it. Hold onto the ball, shut the play down, and give your pitcher a chance to get out of the inning without allowing that runner to score. According to the rulebook, batter's interference is a delayed dead ball where the batter will be called out, and runners sent back to their original base, only if the catcher fails to throw out the runner.
In some situations, it might be more advantageous to keep the hitter at the plate and have an opportunity to take a runner in scoring position off the base paths. However, I believe the risk is too high when considering all the angles. While I can see the argument for letting it rip in college and above, I cannot support that approach otherwise.
Now, if there is a left-handed batter in the box, does a right-handed catcher need to do anything other than stand up, get slightly more turned towards 3B while shuffling their feet, and throw? No, that about sums it up for that scenario. But assuming there's a right-handed batter who isn't stepping back into our throwing lane, we want to find a way to execute this throw quickly and accurately.
FOOTWORK DURING A THROW TO 3B:
The first step in a throw to 3B is to create our throwing lane behind the batter. Some coaches advocate jumping backward to get behind the batter and clear a path for the throw. Unfortunately, while this does clear a path for the catcher, it often results in little or no control over body momentum, leading to a backward fall while making the throw. This is not ideal for accuracy purposes.
Instead, we advocate for creating the path behind the batter and slightly up the foul line using a controlled approach.
Catchers should slide their right foot behind and past their left foot while keeping their center of gravity over their hips. The phrase we like to use is "keep your chin and nose in front of your hips and toes" while dragging the right foot behind the left. This ensures that catchers maintain control over the direction their body weight is traveling when making the throw. If a catcher's center of gravity sits behind their hips, their body will fall backward while trying to make the throw, likely resulting in a high and inaccurate throw. By keeping the bodyweight forward, the legs can work underneath to create a throwing lane without losing control.
To line up our hips with the target, the instep of the catcher's back foot should be turned toward 3B by the time it moves behind and past the front foot. Once the back foot plants into the ground, we can redirect all our momentum toward 3B. If the instep of the back foot is not turned toward third base, the catcher will almost always throw with their front side open, causing a high throw. We want catchers to aggressively turn that corner behind the batter and get their front side pointed at third base.
COMMON MISTAKES DURING A THROW TO 3B:
Aside from jumping backward and throwing off balance, the most common mistake is waiting too long to get the body moving toward 3B. In each of the videos above, you'll see the catcher initiating movement before the ball reaches their glove. While we want strikes to look like strikes, we don't have the luxury of waiting to catch the pitch before getting our body in motion for the throw. Lastly, catchers frequently lose control of their arms during this throw by letting the throwing arm swing down as their feet move behind the batter. This lengthens the throwing motion and makes it nearly impossible for the catcher to stay "on top" of the throw, leading to a high throw away from the intended play or tag. It's crucial for catchers to maintain the same exchange point and hand/arm positioning as in a throw to 2B to ensure an efficient throwing motion.
PICKOFFS TO 1B:
Pickoffs to first base can be an incredibly valuable weapon for catchers, but it's important to understand the intent behind any throw a catcher makes. A pickoff to first base can have two separate goals. First, we might want to shorten the runner's lead to second base, which can increase our team's chances of getting the lead runner out on a ground ball, preventing them from reaching third base or home on a double, or throwing them out if they attempt a steal. Second, we might aim to catch the runner sleeping and throw them out.
While I never want catchers to be afraid to throw for fear of making an error, it's important to note that the primary goal of keeping the runner closer to first base can often be achieved without actually throwing the ball. Simply acting as if we might throw to first can plant a seed of doubt in the runner's mind and make them shorten their lead. That said, catchers should understand that part of their job is to hunt for outs. Opponents may give you extra outs, and catchers have the best chance of finding those opportunities and making them happen. This is one of those opportunities, so if a runner appears inattentive and willing to give you an out, take it—but only if you have confidence in making an accurate throw.
You see, I have no problem with catchers who have worked on this skill attempting a pickoff in almost any situation. However, what frustrates me is watching a catcher make a simple error that could have been prevented with more practice or a better approach. Now that we understand the "why" behind making this throw, let's focus on the "how."
FOOTWORK/BODY POSITIONING DURING A PICKOFF TO 1B:
We'll split this next section into the approaches associated with throws to first base while standing up and throws from our knees.
For throws to first base while standing up, the initial steps are quite familiar:
1. Start in a standing position and begin getting the upper body turned before the ball reaches the glove.
2. Catch the ball.
3. Bring the glove on top of the throwing hand (palm up transfer) in the middle of the body to transfer control of the ball to the throwing hand.
4. Get upright and turn the lower body toward the target.
The significant difference compared to throws to second base and third base lies in the last step. Instead of bringing the back foot underneath the center of gravity, we use what is called a "negative step." This means the throwing-side foot travels backward while we turn toward first base, closing the hips more quickly.
As we catch the ball, we need to get our front side pointed toward first base as soon as possible. The key to achieving this is pulling the right foot backward and getting the instep pointed at first base while starting our stride in that direction. How can we maintain control of our body when the right foot moves past the center of gravity? The left foot balances this movement by starting the stride forward almost simultaneously. The legs essentially switch places as we turn our body. From there, it's as simple as finishing the stride and making the throw.
Take a look at a couple high-level athletes demonstrating this approach in-game.
You can see both Danny Jansen and Keibert Ruiz using this approach to pick off runners at first base. Jansen with a clear path to first base and Keibert from behind the batter.
They both start turning their body toward first base before the ball reaches their mitts.
As they catch the ball, they continue to turn toward first base, with their right foot pulled behind them and their left foot moving forward. Notice how they get the instep of the back foot pointed at their target.
Once the back foot plants into the ground, they can redirect all their momentum toward first base and make the throw. The key is that both these throws, while incredibly quick, are executed under complete control, and neither catcher is off-balance at any point.
PICKOFFS TO 1B FROM THE KNEES:
While I firmly believe that throwing from the knees is not actually faster, there's a lot to say about the approach's deceptiveness in pickoff situations. It is less recognizable than a catcher who is already in the process of standing up. Let's examine a few throws and break down the process.
Two throws, one with no obstruction and the other with a left-handed batter in the way, show two very similar approaches. Both catchers initiate body movement just before the ball reaches their glove, and as they catch the ball, they turn their left knee down and toward first base.
Once they've caught the ball, they create the necessary resistance between the upper and lower halves of their body by driving their left knee toward the ground and their right foot toward the target. By digging their right foot into the ground and pushing off in the direction of their target, they generate the force needed for separation between their slightly closed upper body and open lower body. This resistance and tension are felt in the strongest parts of the catcher's body, allowing the arm to follow the high-level throwing pattern discussed earlier.
As the lower body drives forward and open against the slightly turned torso, the arms work behind the body into thoracic extension. Simultaneously, the upper body shifts open toward the target, allowing the arms to lay back behind the head. This throwing pattern is identical to the one used when throwing standing up, but because it's executed from the knees, it won't generate the same velocity. However, the deceptiveness can compensate for the reduced velocity, as demonstrated by both catchers successfully throwing the runner out at first base.
FINAL THOUGHTS - THROWING:
There are numerous different approaches to throwing being taught to catchers worldwide. Many of these approaches are based on misconceptions about how the human body works most efficiently. While we have examined every aspect of body movement during a throw, it's not rocket science. Establishing consistent high-level movement patterns allows us to utilize our body's capabilities in a throw.
Every individual's body is different, and some approaches may require slight modifications. However, the foundation for each throw should remain largely the same from athlete to athlete. This doesn't mean we're trying to fit everyone into a standardized mold. Individual style doesn't necessarily mean inefficiency, and there are plenty of differences between one athlete's body and the next that may necessitate some adjustments. Nevertheless, we shouldn't let these differences detract us from understanding the most efficient way to perform any skill. We should always strive to find the best approach, one that gives us an advantage over those who don't utilize it. I wholeheartedly believe that this section has provided anyone reading this e-book with precisely that.


